Well, look no further.
, we offer workshops that are bespoke, one-to-one and taylor made to meet your needs.
Gift vouchers are available.
Day-in-the-life-of a Mountainsport Photography Workshop with Dave Willis:
It's always nice to spend a day with students who are learning their cameras, because they are like a blank canvas or in this case perhaps a "clean slate" would be a more appropriate allusion, seeing as we headed for the amazing slate quarries of the Little Langdale valley, here in the Lake District.
We start out by getting a handle on the camera controls and buttons and setting up the camera to give us consistent results. Then we can get going.
On this occasion the plan would be to head out through some woodland to Little Langdale tarn and up to the Black Hole and Hodge Close quarries which have some surprising caves and arches to photograph, useful when the weather forecast is changeable. In the event, the sun stayed out and we found ourselves able to shoot landscapes as well, but the quarries proved a great success for my guys, who were very keen on abstract forms.
We talked about depth of field and aperture priority with some nice examples of short depth of field details in the woods and then some max DoF over at Little Langdale tarn.
Working through the camera modes led to a discussion about how depth of focus and depth of field are related and linked and I think this something that is often overlooked when the subject is discussed. I have a simple experiment that I get students to do called the "finger experiment" that really brings home how depth of field and depth of focus work together - you'll have to join a workshop to find out what it is!
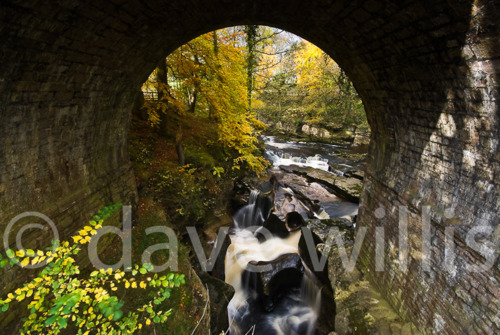
Moving into the quarries, I was aiming to break out the tripods and talk about shutter speed as a creative tool for motion control with some moving water. I spend time drumming into students how important it is to think about camera shake every time you pick up the camera - that's why we carry a tripod after all - so we can use those slow shutter speeds effectively.
While we looked for some interesting abstract patterns and details in the rock walls, which could have kept us entertained all day actually, we had a chance to consider what really makes a great photograph. Fundamentally, in my view it comes down to three things.
1: Most (but not every) photo needs a strong
focal point. Without it the viewer is struggling to identify what they are supposed to be looking at. If your photo doesn't have one, it had better have something else which is strong enough to carry the picture - could be amazing light, strong repeating pattern or abstract form or it could vibrant colour patterns, whatever, it needs something. Here, I'll show you what I mean:
We shot this landscape later in the day. Can you spot the strong focal point? Course you can - that juniper (or whatever it is) just stands right out as the starting point, in other words the
focal point for this composition, doesn't it? That's what you need.
2:
Backgrounds ruin pictures! Oh yes. Look at it this way. You spend ages choosing, organizing and composing your subject. You think about it carefully and try to do the best job you can with it., The one thing you didn't maybe even consider was the background. But the background is where all the clutter, mess, distracting details and litter is going to be. Do you really want all those parked cars, telephone wires, bins, people wearing lurid colours in the background, taking the eye away from your carefully chosen subject? Thought not. So...backgrounds ruin pictures - choose them with care.
3:
KISS - Keep It Simple, Stupid! Do you like this picture? Simple isn't it. The less you put into your composition the clearer, more direct and easier to understand it will become. It will be eye-catching. Many of us just put too much confusing stuff into our photos. Git rid, simplify, pair it down.
Let's apply all three of those principles to this shot:
Does it have a strong focal point? Yes.
Does it have a good background? Yes, just the door.
Is it simple? Too right.
See, easy isn't it.
Fancy a go yourself? you can book a personal one-on-one workshop any day you like, long as I'm free on that day. It costs £135 per person and we do whatever you need to do to get your camera and creative skills up to speed.